In this guide, we will learn how to set up a remix and begin exploring a variety of features that distinguish it from other JavaScript frameworks such as Gatsby and Nextjs. We will then look at how to use nested layouts and new features such as a data-loading mechanism in a remix.
What Is Remix
Remix is a full-stack web framework that lets you focus on the user interface and work back through web standards to deliver a fast, slick, and resilient user experience.
As the creator of Remix says, “Remix is like JavaScript for boomers.“.
If you are a Rails developer or a PHP developer, you are going to get stuck at a point where you feel that the backend code is separate from your client or front end.
Remix just makes this completely seamless. You can just think of it as a backend web framework that magically hydrates into a React app in the browser. Remix will push you to be a full-stack developer, and we are going to see why.
Remix vs Gatsby/NextJs What Is the Difference?
By default, when we make a React application by ourselves, it will be client-side rendered, which means that only after the user goes to your website and downloads the JavaScript files, will React run and very quickly build the UI of your application.
So if the user does not have JavaScript enabled (which is not a common problem), or if the user has a slow connection and it takes a long time to download your JavaScript files, it will be a time when the user is not going to see anything.
So what all these frameworks do is try to fix this problem in one way or another. Of course, it’s not the only problem they fix, but just to get an idea of the key difference between those frameworks.
To understand the difference, let’s take an example starting with GatsbyJs when we create a Gatsby project and run:
$ gatsby develop
Gatsby generates some HTML so the user will see something, and then after the page is loaded, everything will be interactive.
Gatsby has something called plugins, which allows us to customize the HTML that the user will see before everything is loaded (that is why it is a good choice if you are building a static website).
Creating Your First Web App Project With Remix
When going to create a remix application on the console, it will ask you where you are going to deploy your project. Based on what we have already seen with Gatsby, you may be asking why we need a server if we just need to render pre-generated HTML files the way Gatsby does.
The answer is no, remix needs a server because it runs on both the server and the browser. The client-side rendering issue that we have been talking about is solved by Remix.
By default, if we go to a website that is using remix, it is going to render that page on the server first, which means remix is going to run Reactjs on the backend and give it to the user without seeing any loading indicator. When they get the page, the page will be 100% fully rendered. That means we see the UI at once and quickly.
That is just one of a lot of differences that we have between Remix, GatsbyJs, and NextJs. This guide will learn and discover how Remix differs from others.
Setup a Remix Project
To set up a remix project, you need to install the npx command in your system and then create your first remix project by running:
# npx create-remix@latest
The above command will give us a nice remix installation and then later ask for the name of your project. In my case, I just stick with the default name.

Then we need to choose the type of installation you need. In our case, we just started learning to remix, so let’s choose the basics. The other choice, which is pre-configured, gives you a lot of other stuff to use with Remix (production ready).

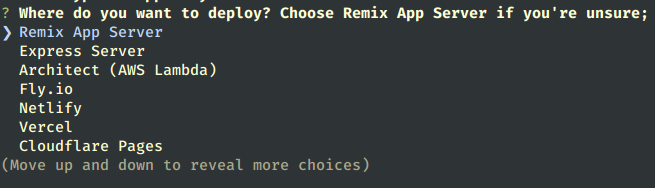
Then it will ask where we want to deploy your remix app, don’t worry, we can deploy our remix app anywhere; this just gives us some predefined options. In our case, let’s just select the remix server.
And they ask if we want to use JavaScript or Typescripts. Let’s just stick with typescript.

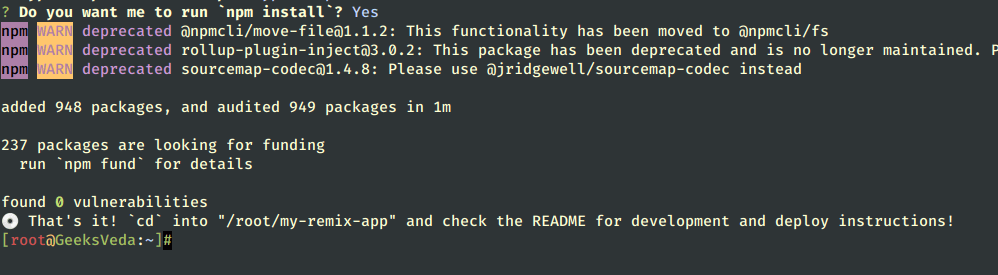
Of course, we need to run the npm install, so let’s hit YES.
Finally, let’s start our remix project by running the command.
# cd my-remix-app/
# npm run dev
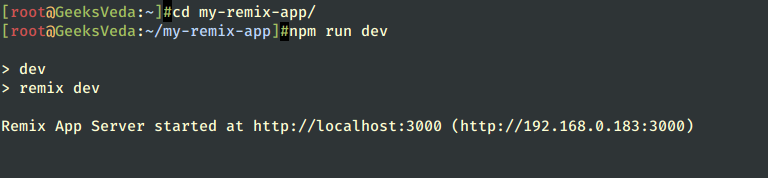
and let’s navigate to:
http://localhost:3000
Or
http://Server-IP:3000
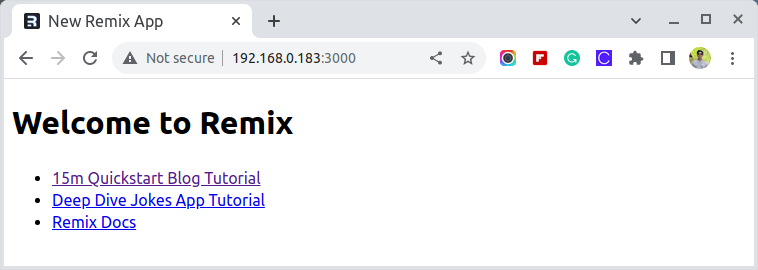
Congratulations, you will see our basic remix app.
Understand Remix Code Structure
If we open the folder “my-remix-app” that contains our remix application in your code editor, we will see something like this.
# cd my-remix-app/
# ls -al
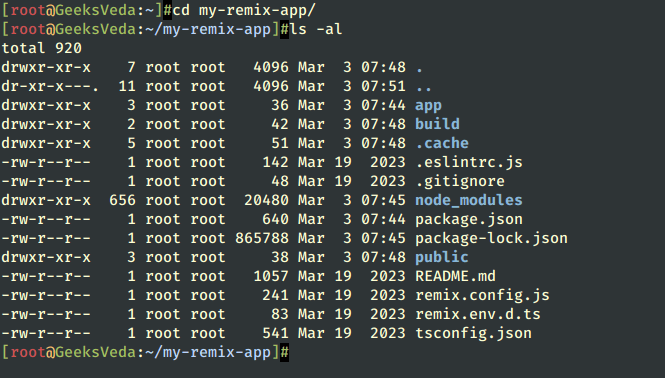
So let’s dive in and understand this structure, which may change in the future, but in general, this is the same structure.
.cachedirectory is a temporary cache directory.appdirectory where we’re going to work on your application, which contains a bunch of other files and folders.app/root.tsxis the root of our project. If we take a look at this, it describes the structure of the HTML that we have on our index page.
Take a look at this part.
import type { MetaFunction } from "@remix-run/node";
import {
  Links,
  LiveReload,
  Meta,
  Outlet,
  Scripts,
  ScrollRestoration,
} from "@remix-run/react";

export const meta: MetaFunction = () => ({
  charset: "utf-8",
  title: "New Remix App",
  viewport: "width=device-width,initial-scale=1",
});
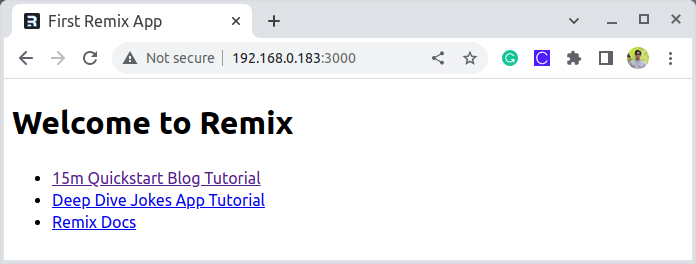
This meta function will set meta tags for your HTML document. Let’s change the title of the page to the First Remix app and add a description.
export const meta: MetaFunction = () => ({
  charset: "utf-8",
  title: "First Remix App",
  viewport: "width=device-width,initial-scale=1",
  description:"Start Learning Remix with GeeksVeda"
});
If we go ahead to localhost:3000 and inspect the page, we will see that we just changed the title and added a meta element with a description to our page. This, of course, helps with SEO.
In the same way that we add meta functions, we can add a link, and we’re going to see that later when we need to work with CSS. If you pay attention to the index page, there is some content.
The above content comes from the file index.tsx inside the app/routes/ folder, so this is actually what renders the page (the root page). Let’s delete all that.
export default function Index() {
  return (
    <div style={{ fontFamily: "system-ui, sans-serif", lineHeight: "1.4" }}>
      <h1>Welcome to Remix</h1>
      <ul>
        <li>
          <a
            target="_blank"
            href="https://remix.run/tutorials/blog"
            rel="noreferrer"
          >
            15m Quickstart Blog Tutorial
          </a>
        </li>
        <li>
          <a
            target="_blank"
            href="https://remix.run/tutorials/jokes"
            rel="noreferrer"
          >
            Deep Dive Jokes App Tutorial
          </a>
        </li>
        <li>
          <a target="_blank" href="https://remix.run/docs" rel="noreferrer">
            Remix Docs
          </a>
        </li>
      </ul>
    </div>
  );
}
Now, if we navigate to localhost:3000, there is just an h1 with “welcome to remix.”.
Let’s understand other folders and files:
- entry.client.tsx file module gives us full control over the “hydrate” step (taking something static like HTML and connecting JavaScript to it and making it dynamic) after JavaScript loads into the document.
- entry.server.tsx file allows us to handle requests and render the entire server app. An entry server takes all the components in our application and renders them as a string, giving us full control over the way the markup is generated and sent to the client.
- The build folder contains assets generated during the build process.
- For our application to run, we need a lot of NodeJs packages, so the node module is where all those packages live.
- The public folder is where we keep our public assets (images, audio, video, and so on).
- Package.json describes the dependency that is installed.
- remix.config.ts is where we can configure our remix project, such as the app directory, which we can change from app to something else if we don’t like the name app, or publicPath, which we can change from build to whatever we want, and so on.
- remix.env.d.ts and tsconfig.json just allow us to reference some types and contain some compiler options. We don’t need to deal with the theme.
Create Pages In Remix Using Routing
Let’s dive into how to use routes within remix.
Let’s navigate to localhost:3000 this matches the root of the project, which is rendered by index.tsx inside of routes, but what if we want to introduce a new page? For example, page1.
Let’s navigate to localhost:3000/page1.
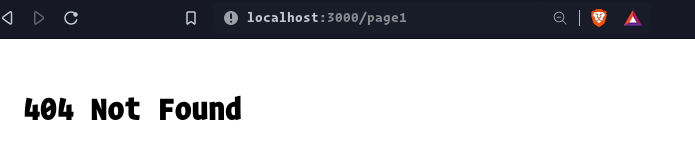
We got a 404 Not Found an expected error because we don’t have a page in our project called page1, so let’s go ahead and create that page inside the routes folder and name it the same name as *page1, and it will be the file that represents:
localhost:3000/page1
After we create the page, let’s return to our browser and hit refresh.

We get a different error, which means we do have the page but it is empty, so let’s go to our page and add a default export (a react component).
export default function page1(){
     return <div> hello this page1  </div>
    }
If we hit refresh on the page, we will see “Hello this page1“.

That is how we do routes with remix, and if we need to introduce a parent path, we need to create a folder inside routes.
Let’s do an example by creating a parent path called “pages“, so inside our routes folder, add a folder with the name “pages“.
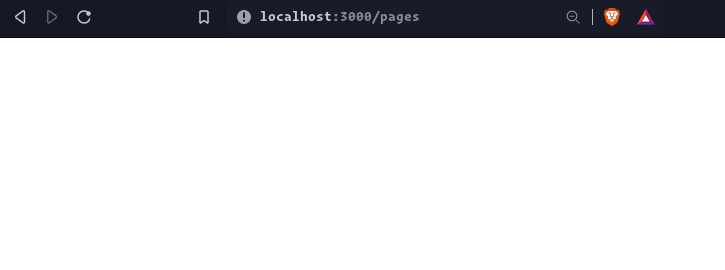
As you may expect, if we go to localhost:3000/pages, you will get a 404 because we don’t have a file that represents pages. We just created an empty folder. In the last example, what we did was just create a page1.tsx Try to do the same inside the pages folder.
Let’s create a new file called pages.tsx, but we still get 404 Not Found because the parent path does not work like that instead of pages.tsx rename it to index.tsx and now if we hit refresh.
OK, now we get “Unexpected Server Error“, as we know that an error means the file exists but is empty, so if you follow along with this, you may understand that the index.tsx file represents the parent route called pages.
So whenever we want to create a parent route, we have to create a folder with the name of the route that we need and inside that folder, we should add index.tsx‘.
Let’s go back to our /pages/index.tsx and export the default function with a simple message.
   export default function pages(){
     return <div> hello this parent pages  </div>
    }

I can predict your question. Now, which is what if we need to have Nested Routes, let’s do an example of it. As an example, let’s create two pages within our page routes and call them page2 and page3, so we’ll have something like this.
  ├── index.tsx
  ├── page2.tsx
  └── page3.tsx
And add the default function.
   export default function page2(){
     return <div> hello this page2  </div>
    }
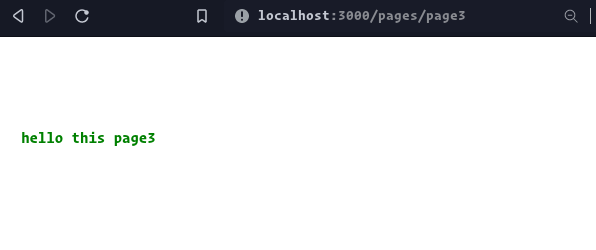
  export default function page3(){
     return <div> hello this page3  </div>
    }
Now if we need to show page 2 or page 3, visit:
localhost:3000/pages/page2
 or
localhost:3000/pages/page3
We call this type of route “nested routes“. Here in our example, we created an index.tsx inside our pages folder, but it’s not necessary. we can subroute directly without an index.tsx.
Create a Nested Layout with Remix
Let’s say we need to have the same layout for all 3 pages (for pages, page 2, and page 3). Instead of repeating the same style three times, we just need to do that once, so here it comes to Nested Layout.
At this point, we don’t have any CSS files, which is why we are going to use some inline styles. Imagine that we need the color of the text to be green and the padding to be 20 for the 3 pages. Can we do that once?
Let’s go to our routes folder and create pages.tsx and here we can define the styles that we need to apply to our 3 pages. Make sure that you create the pages.tsx inside the routes folder, not inside the pages folder.
export default function pages() {
      return (
        <div>
        </div>
      );
    }
Now if we go to localhost:3000/pages.
There is nothing here at this point because we did not define the outlet component. As the name explains, Outlet is a wrapper around our routes, which is basically where the nested routes are going to be rendered.
 import { Outlet } from 'remix';
    export default function pages() {
      return (
        <div>
           <Outlet />
        </div>
      );
    }
Now our nested layout is ready, we just need to add the CSS styles we need to apply to the 3 pages.
 import { Outlet } from 'remix';
    export default function pages() {
        return (
          <div style={{ color: 'green', lineHeight : 10, padding: 20 }}>
            <Outlet />
          </div>
        );
      }
Now we just apply text color, padding, and line height to all the 3 pages.
Congratulations, we’ve just implemented the Nested layout with Remix.
Remember, whenever we see a file with the same name as the folder inside routes and at the same level, that file becomes the layout for that folder.
But you may have a question: if I need a nested route without a nested layout, how can we achieve that? So the solution to this is that we create a file inside the routes folder with the same name as the nested route.
In our case here, we have pages, so we need to create a file with the name pages (which is the name of our nested route) plus the name of the route that we want to create, for example, pages.home.tsx.
The structure of the routes folder will be like this:
routes ➤
    ├── index.tsx
    ├── page1.tsx
    ├── pages
    │   ├── index.tsx
    │   ├── page2.tsx
    │   └── page3.tsx
    └── pages.tsx
The file pages.home.tsx will be like this:
export default function home() {
      return (
        <div>
          <h1>hello this Home page</h1>
        </div>
      );
    }
Now let’s navigate to localhost:3000/pages/home and we should see our page without nested styles.
This is another way to do nested routing. It does need to be in the same folder. We can create a nested route just like what we did now. But when we use the folder, it takes advantage of the nested layout.

Loading Data into Components Using Remix
Loaders in Remix are a great way to dive into pulling in dynamic content or data in our application. Let’s say that we have some content that we need to run and access before the page has been built.
Loading data in the remix is handled in a different way using something called a loader, and it only runs on the server side, which allows us to fetch data on the server side before the components are rendered.
In Remix, each routing module can export a loader function and it allows us to define some data and use it in our components using react hooks. This loader function can return anything, which could be a string, array, or object.
Let’s do an example here:
   export let loader = () =>{
      return {
        website : "Tsoding.com",
        technology : "Remix",
      }
    };
If you’ve been paying attention, you’ll notice that we said we needed to use react hooks to use this in our components, so let’s import a hook called useLoderData.
import {useLoaderData} form "remix";
And we are good to go and use our loader first.
let { website, technology } = useLoaderData();
And the final result will be like this:
    import { useLoaderData } from 'remix';
    export let loader = () =>{
      return {
        website : "Tsoding.com",
        technology : "Remix",
      }
    };
    export default function Index() {
      let { website, technology } = useLoaderData();
      return (
        <div style={{ fontFamily: "system-ui, sans-serif", lineHeight: "1.4" }}>
          <h1>Welcome to Remix</h1>
          <ul>
            <li>
                Quickstart {technology} Tutorial by {website}
            </li>
          </ul>
        </div>
      );
    }
The loader function is running on the server side, and the components themselves are on the client side.
This is a very quick introduction to the loader function and what we can do with it. However, this is just one use case of it. We can use it to fetch data from an API or to query a database as all this is running on the server side and we can get data that looks like what we did.
Fetch Data From an API Using Remix
Let’s do an example of fetching data from an API, and for this, we’re going to use fetch as a remix to promote the old-school way of using the web API that already exists in the browser. We don’t have to install anything else.
As an example, we’ll use the remotive api, an API for jobs using its Github documentation.
First, let’s do an API call on our loader function.
export const loader = async () =>{

      const jobs = await fetch('https://remotive.com/api/remote-jobs?category=software-dev')

      return jobs.json();
    };
Here we just make our function async and return a JSON response. Let’s use our jobs in our component.
const { jobs } = useLoaderData();
Let’s show jobs in our component.
return (
<div style={{ fontFamily: "system-ui, sans-serif", lineHeight: "1.4" }}>
<h1>Welcome to Remix</h1>
<ul>
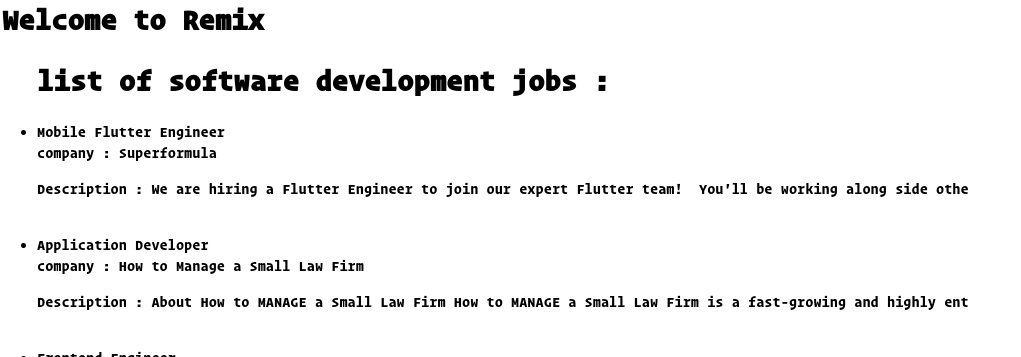
<h1> list of software development jobs: </h1>
<div>
{jobs.map( (job) => (
<li>
<div> {job.title} </div>
</li>
))}
</div>
</ul>
</div>
);
We only show the title here, but the API provides us with additional information such as a description, salary, company name, and category.
Let’s add description and company_name to our components.
return (
        <div style={{ fontFamily: "system-ui, sans-serif", lineHeight: "1.4" }}>
          <h1>Welcome to Remix</h1>
          <ul>
              <h1> list of software development jobs : </h1>
                  <div>
                      {jobs.map( (job) => (
                      <li>
                        <div> {job.title} </div>
                        <div>company :  {job.company_name}  </div>
                        <p> Description : {job.description} </p>
                      </li>
                      ))}
                  </div>
            </ul>
        </div>
      );
First, let’s minimize the number of words in the description field by using the slice method and getting just the first 100 words.
<p> Description : {job.description.slice(0, 100)} </p>
And the result should be something like this but we still have a problem here. We need to remove the html tag from our description by using replace method.
<p> Description : {job.description.replace(/<\/?[^>]+>/gi, '').slice(0, 100)} </p>
And we should get a clean description like this.
Conclusion
Remix is a powerful framework for building web applications with React that provide a streamlined approach to routing, component management, data loading, testing, and debugging.
By learning Remix, you can create scalable, maintainable applications with ease and provide a better user experience for your users.