In this modern web development world, having knowledge about including one JavaScript file into another JavaScript file is essential for ensuring a smooth web experience and optimizing web performance.
So, today’s guide will explore different methods such as <script> tag, import/export modules, RequireJS, jQuery, and Dynamic script loading for including one JS file into another.
Moreover, we will also discuss the benefits of including JavaScript and its relevant best practices.
What is File Inclusion in JavaScript
In JavaScript, file inclusion refers to the process of including external JavaScript files into another JavaScript file or a web page. It permits developers to organize and separate their code into reusable modules. This facilitates better collaboration and improves code maintainability.
Benefits of Including Files in JavaScript
Here are some of the benefits of including one JavaScript file in another.
- Simplifies dependency management.
- Code organization and modularity.
- Enables code readability.
- Code reusability.
- Faster load times.
- Performance Optimization.
- Scalability for adding new features.
How to Include a JavaScript File Into Another JavaScript File
For the purpose of including a JavaScript file in another, we will discuss the following approaches.
- <script> tag
- import/export module
- RequireJS
- jQuery
- Dynamic Script loading
Let’s head towards their individual demonstration!
1. Using the “<script>” tag
In JavaScript, the “<script>” tag is a widely supported method that can be utilized for including one JS file into another. It enables you to directly refer to external JavaScript and also specify the order of inclusion.
This approach is appropriate for cases when you have a limited number of script files to include or for smaller projects.
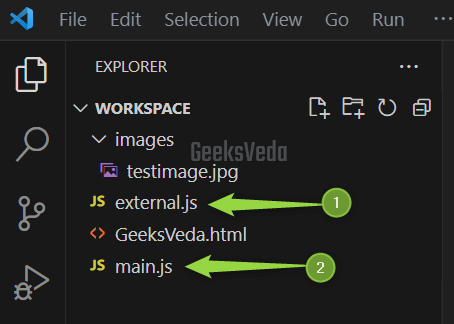
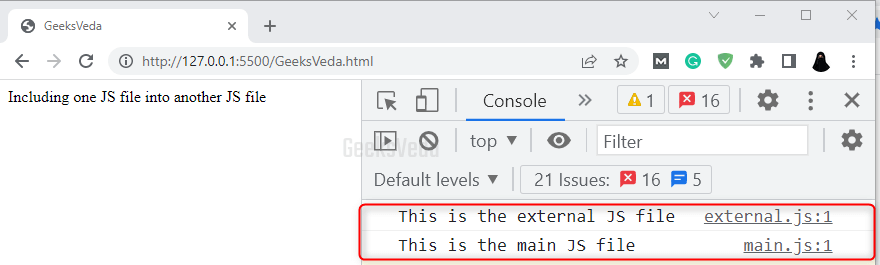
Now, let’s practically test the approach. To do so, we have created two JavaScript sample files named “external.js” and “main.js“.
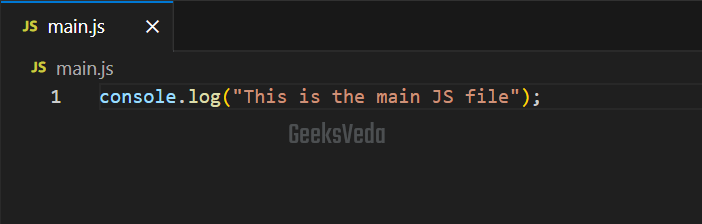
Then, within the “main.js” file, we have invoked the console.log() method that will display the following message.
console.log("This is the main JS file");
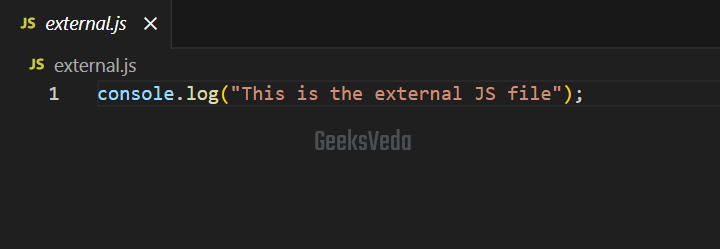
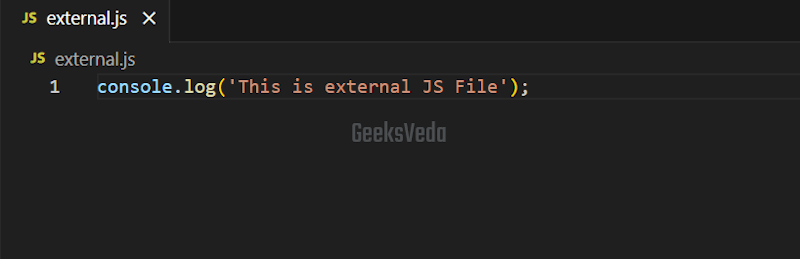
Similarly, we have added the console.log() in the “external.js” file.
console.log("This is the external JS file");
Now, we will create an HTML file named “GeeksVeda” having a “<head>” and a “<body>” section. Then, we have added the title of the page. Inside the “<body>”, we have added a “<p>” or paragraph elements with some text.
For including the JavaScript file, the "<script>" tag is used. In our scenario, we have defined two "<script>" tags with the “src” attribute. This attribute is set to the file paths of both main.js and external.js.
Note that, including the external.js file before the main.js file will make sure that all of the code comprising the variables or functions of the external.js file is accessible to main.js.
<html>
<head>
  <title>GeeksVeda</title>
  <script src="external.js"></script>
  <script src="main.js"></script>
</head>
<body>
  <p> Including one JS file into another JS file </p>
</body>
</html>
Run your project to test out the working of the provided code. It can be observed that we have successfully included one JS file into another and their relevant messages have been displayed on the console.

2. Using “import/export” Modules
The second approach is to utilize the “import” and “export” ECMAScript modules for including one JavaScript file into another JavaScript file. It gives you the control to modularize the handle and also handle the dependencies in an effective manner.
This method is recommended for extensive projects or when you want to benefit from modular development.
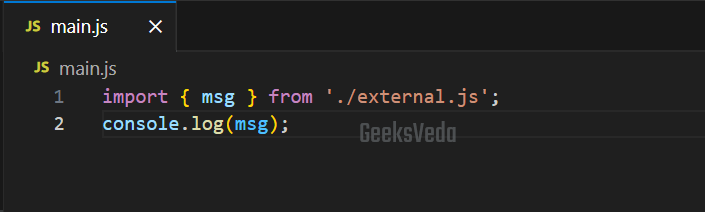
In the provided code, we have the same JavaScript files “external.js” and “main.js” with updated code. Using the import and export module, we will now export the constant named “msg“, which will be then imported into main.js.
For this, in the main.js file, we have utilized the “import” keyword. Here, the “./” part in the statement refers to that the module is placed in the same directory. Then, we will display the “msg” value on the console.
import { msg } from './external.js';
console.log(msg);
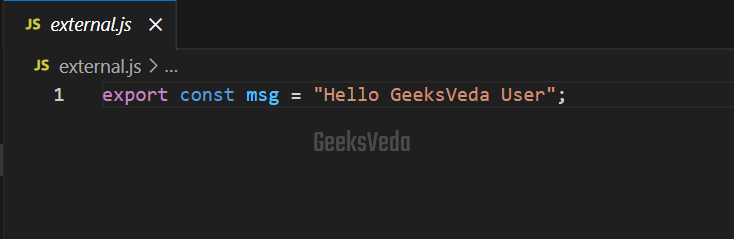
The external.js file simply contains an export statement for exporting the value of the “msg” constant.
export const msg = "Hello GeeksVeda User";
Then comes the HTML file that includes a script tag having “type” set as “module” and “src” as “main.js“. All of the other DOM elements will remain the same.
<html>
    <head>
        <title>GeeksVeda</title>
        <script type="module" src="main.js"></script>
      </head>
<body>
  <h2> Including one JS file into another JS file </h2>
  </body>
</body>
</html>
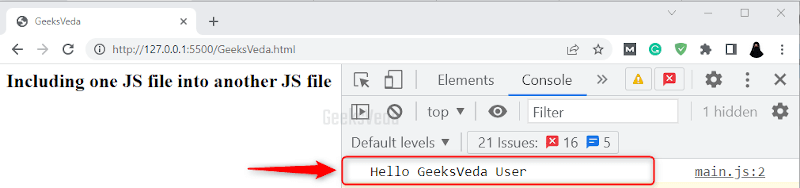
Run your project to test out the working of the provided code. As a result, you can see the value of the “msg” constant has been successfully imported from the external.js and displayed.
3. Using the “RequireJS” Function
RequireJS is a well-known Asynchronous Module Definition (ASM) loader that offers a way for including JavaScript files with relative dependencies. It permits you to define modules and their dependencies.
This ensures the proper loading and the order of the execution. This approach can assist in scenarios where you are working with large projects that need complex dependencies.
require.js file. In our case, we have placed this require.js file in the same workspace.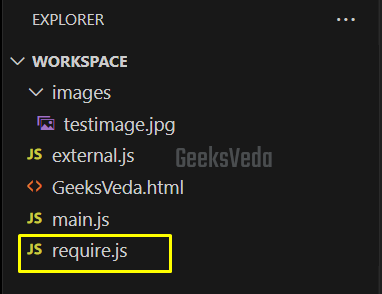
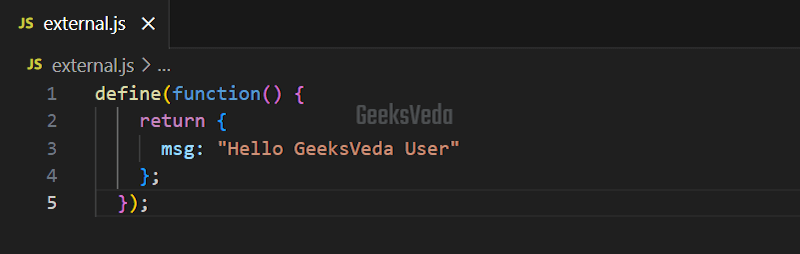
Within the “external.js” file, we have defined a module by utilizing the “define” function of RequireJS. This module then exports an object having a property named “msg” having the following value.
define(function() {
    return {
      msg: "Hello GeeksVeda User"
    };
  });
We have called the “require()” function of the RequireJS for asynchronously loading the “external” module in the “main.js” file. Moreover, we have also passed a callback function that will accept the exported module as an argument.
Within the function body, the console.log() is invoked to print the “msg” value.
require(['external'], function(external) {
    console.log(external.msg);
  });
Lastly, add “require.js” into the “<script>” tag of the HTML file. Its “data-main” attributes refer to the entry point module which is defined as main.js.
<html>
    <head>
        <title>GeeksVeda</title>
        <script src="require.js" data-main="main.js"></script>
      </head>
<body>
  <h2> Including one JS file into another JS file </h2>
  </body>
</body>
</html>
Run the provided code to your project to check whether the changes have been successfully displayed as shown in the below screenshot.
4. Using “jQuery” Function
jQuery is a well-known JS library that simplifies the working of the Document Object Model or DOM. It can be also utilized for including one JavaScript file into another with the “$.getScript()” function.
This approach is suitable when you want to load external JavaScript files or when you are already using jQuery in your web project.
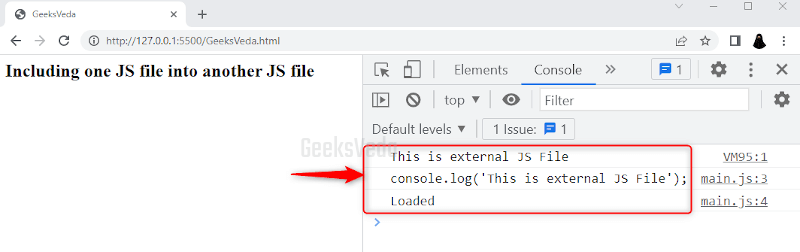
For the demonstration, add the following statement in the “external.js” file.
console.log('This is external JS File');
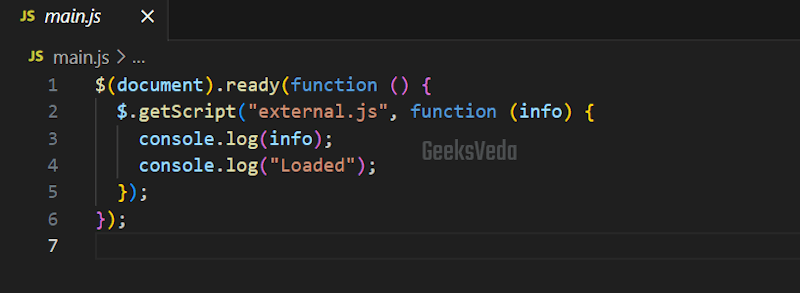
In the “main.js” file, the “$(document).ready()” function will first make sure that the DOM is loaded before running other code.
Inside the mentioned function, the “$.getScript()” function is invoked or called for loading the external.js file.
Moreover, the mentioned callback function is excited in case the script has been loaded successfully. Resultantly, it displays a relevant message on the console.
$(document).ready(function () {
  $.getScript("external.js", function (info) {
    console.log(info);
    console.log("Loaded");
  });
});
To utilize jQuery, specify the “<src>” of the “<script>” tag pointing towards the Content Delivery Network or CDN version of the jQuery. Then, add the script tag for the main.js file.
<html>
    <head>
        <title>GeeksVeda</title>
        <script src="https://ajax.googleapis.com/ajax/libs/jquery/3.6.0/jquery.min.js"></script>
        <script src="main.js"></script>
      </head>
<body>
  <h2> Including one JS file into another JS file </h2>
  </body>
</body>
</html>
Run your project to test out the working of the given code.
5. Using Dynamic Script Loading
Dynamic script loading also permits you to include JavaScript files programmatically. It offers full control and flexibility over how and when the scripts are going to be loaded. This approach can be utilized when it is required to load scripts dynamically at run time based on some particular condition.
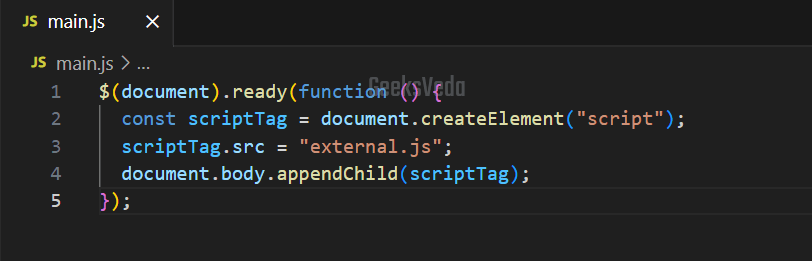
For the corresponding scenario, in the “main.js” file, we will invoke the “$(document).ready()” function for ensuring that the DOM is fully loaded before running any code. Within its body, we will add a new “$.getScript()” tag by utilizing the “document.createElement()” method.
Then, set the “src” of the script tag to the “external.js“. Lastly, the script tag will be appended to the document body with “document.body.appendChild(scriptTag)“.
$(document).ready(function () {
  const scriptTag = document.createElement("script");
  scriptTag.src = "external.js";
  document.body.appendChild(scriptTag);
});
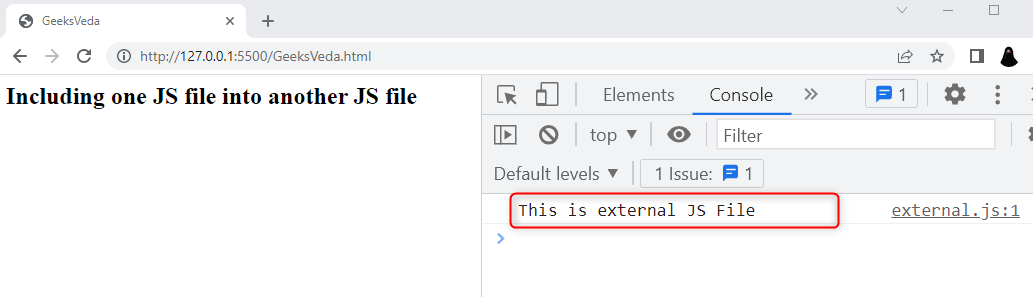
By dynamically creating and appending the <script> tag, the external.js file will be loaded into the web page as follows.
Best Practices for Including Files in JavaScript
Check out the provided list of best practices for including files in JavaScript.
- Maintain a clear structure for including JavaScript files.
- Add script tags near the “” tag for optimal page rendering.
- Use modular approaches and script loaders for handling dependencies.
- Implement error handling,
- Compress and minify JavaScript files for faster loading.
- Utilize asynchronous loading techniques for better page responsiveness.
- Use CDNs for popular libraries and frameworks.
- Avoid inline script tags when possible.
That’s all essential information regarding including JavaScript files from this guide.
Conclusion
Including JavaScript files in an organized and efficient manner is considered crucial for optimizing the user experience and website performance. Utilizing modular approaches such as script loaders, and ECMAScript modules, and following the best practices can ensure faster page load times and better code maintainability.
Want to explore and learn more related to JavaScript, do check out our dedicated JavaScript Tutorial Series!