Are you a programmer and want to learn or switch to Java programming language? If yes, you are at the right place! Java is a versatile and popular programming language widely known for its flexibility and object-oriented approach.
We will begin with a simple and basic program like “Hello World” to start our Java learning journey. This step-by-step approach will help you enhance your coding skills with time and make Java programming easy and enjoyable.
How to Write Hello World in Java Program
The Java “Hello World” program is a basic introduction to Java programming for beginners. It is a short and straightforward code that will show the message “Hello World” on the console.
This program is often the first step for new Java learners, helping them understand how to write, compile, and run a simple Java program. Moreover, it is a fun way to get started and sets the foundation for exploring more complex Java concepts in the future.
Prerequisites
- The first thing you have to do before writing any Java program is to set up a development environment. For this purpose, download and install “Java Development Kit (JDK)“.
- Then, configure the environment variables as it is an essential step to ensure that the Java Development Kit (JDK) and Java Runtime Environment (JRE) are accessible from the command line.
- Lastly, choose a text editor that suits your requirement for writing Java Code such as Eclipse, IntelliJ IDEA, and Visual Studio (VS Code).
Now, check out the provided instructions for writing your first Java program.
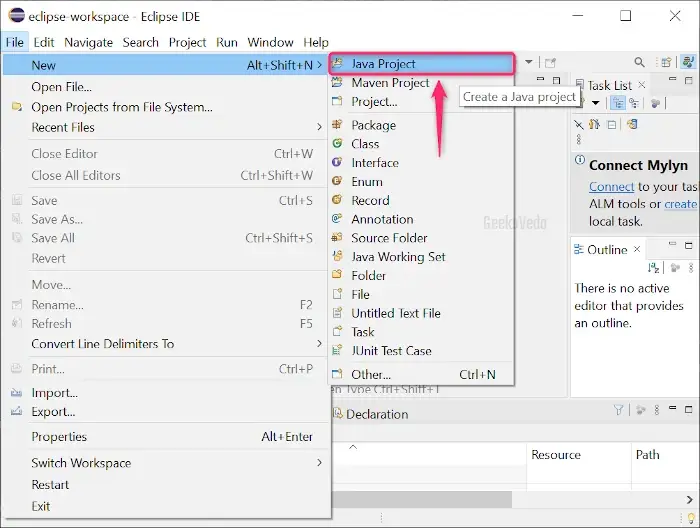
1. Create a New Java Project
Open your Integrated Environment (IDE) and create or add a new “Java Project” by selecting File > New > Java Project option:
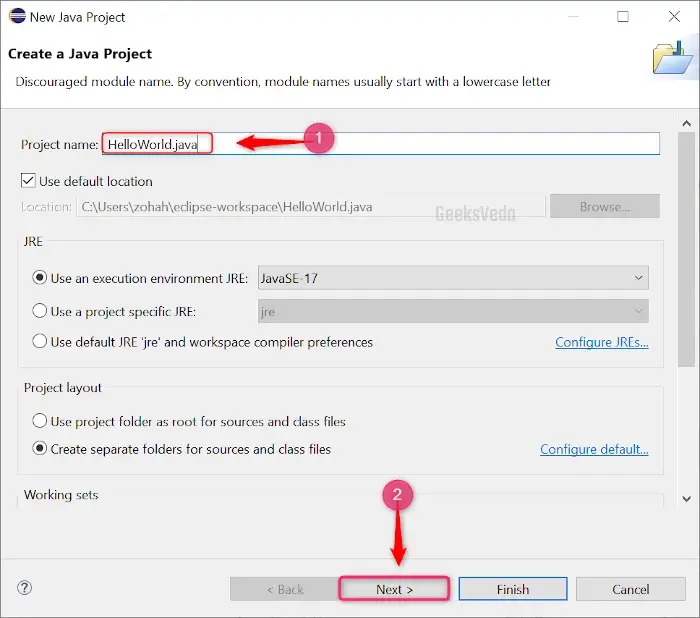
2. Set up Your Java Project Settings
Configure your project settings, such as “Project Name“, “JRE“, and “Project Layout” and click on “Next” and click on “Finish” to proceed next:
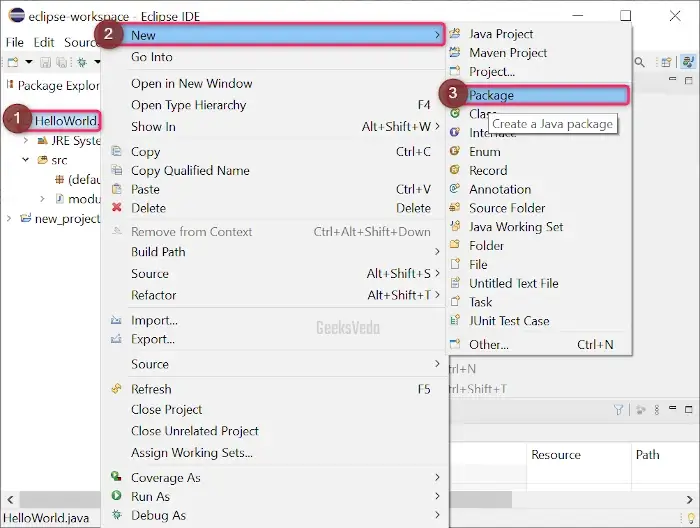
3. Create Java Package
You can easily create a package by right-clicking the “Project Folder” and then move to New > Package.
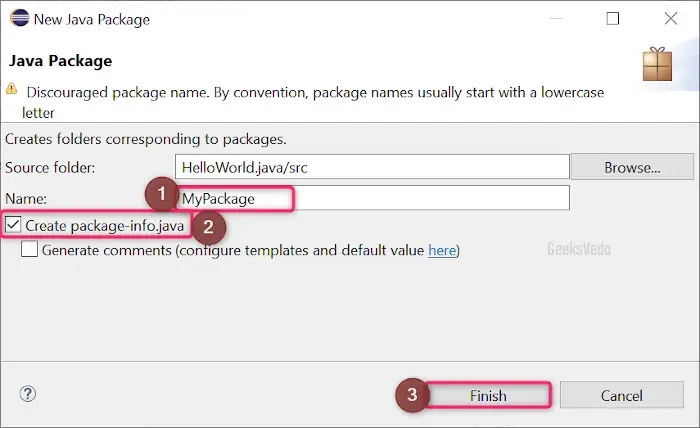
4. Configure Package Settings
Adjust the package settings, such as “Package Name“, and “Source Folder“. Also, you can mark the highlighted box if you want to “Create package info-java” and click on “Finish” for the next step:
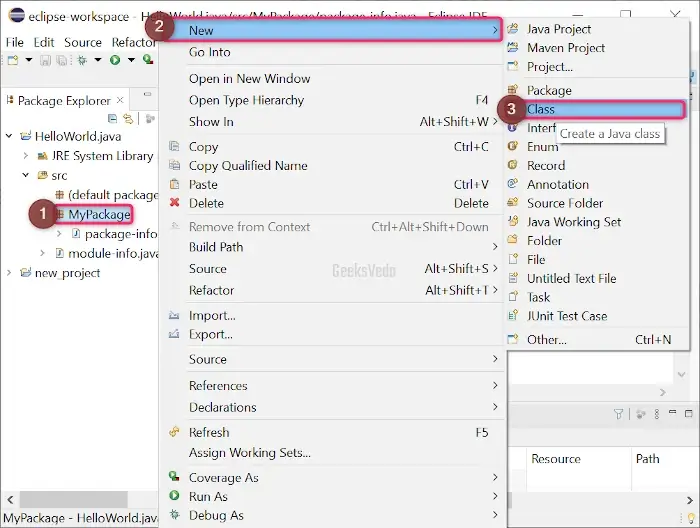
5. Create and Save Java Class
Inside your package, create a new Java class by right-clicking “Package Folder” and then select New > Class:
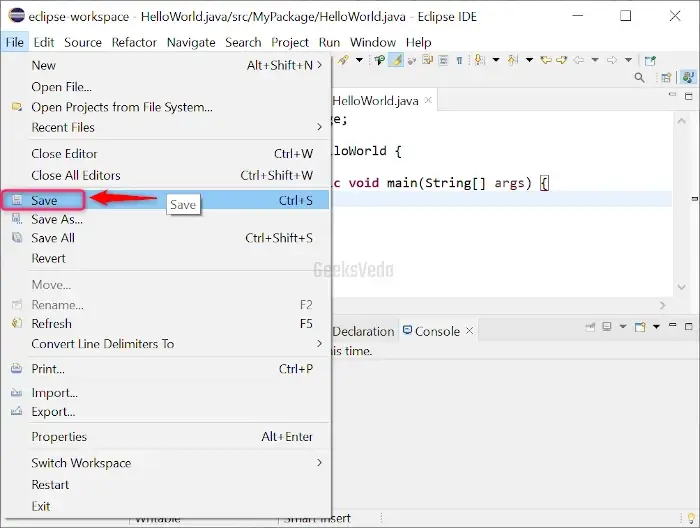
Now, save the Java class by pressing “CTRL + S” or by clicking on “File” and then “Save“:
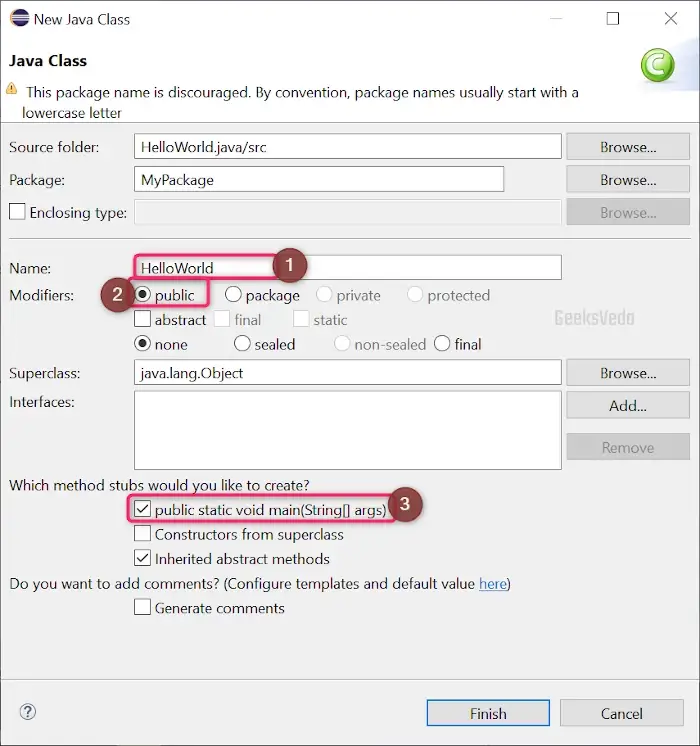
Now, configure the Class settings, such as “Class Name“, “Modifiers” and other necessary settings. Lastly, click on “Finish” to take the final step toward writing the program.
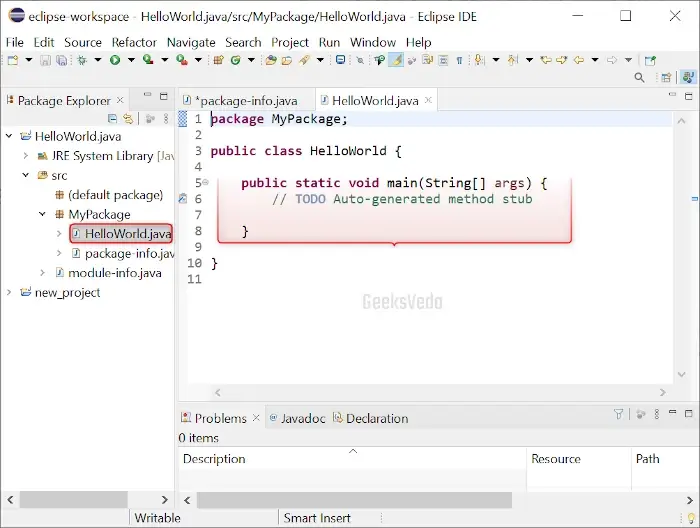
Now, your Java class has been successfully created:
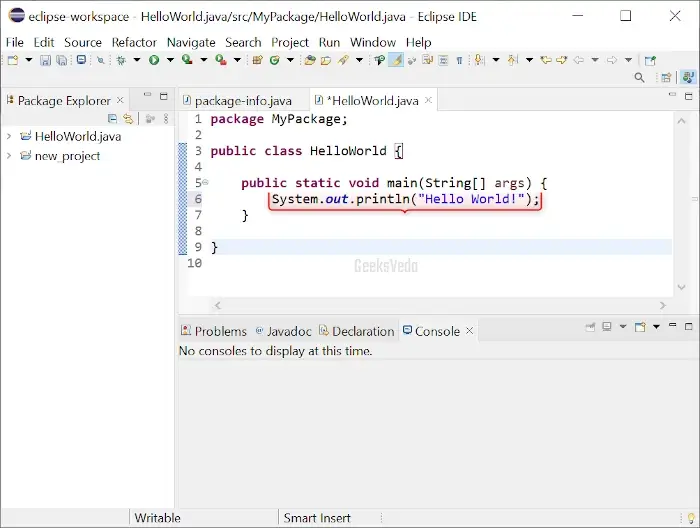
6. Write Hello World Program
Finally, you can write your “Hello World” program by following the proper syntax that is given below:
package MyPackage;
public class HelloWorld {
	public static void main(String[] args) {
		System.out.println("Hello World!");
	}
}
Here is the breakdown of the above code:
- System: It is like a toolbox in Java that has useful tools for doing various operations.
- out: It is one of the tools in the “System” toolbox that helps us show output on the computer screen.
- println: It is a specific tool inside “out” that means “print a line“.
- “Hello World!“: It is the text or string that we want to display on the console.
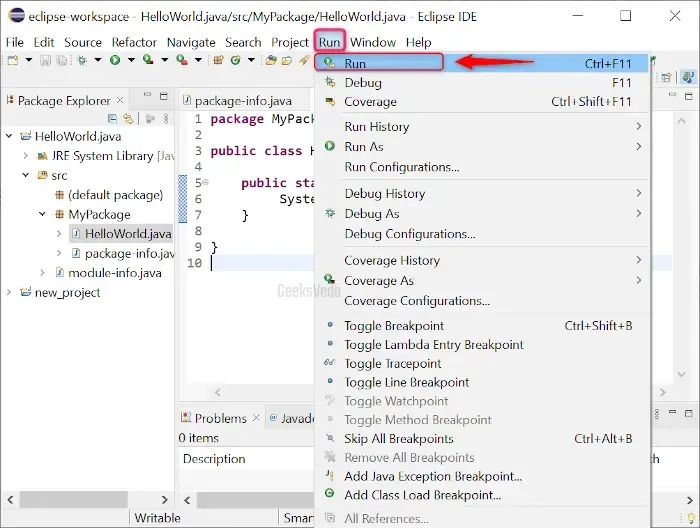
7. Run and View Java Program Output
Now, from the menu bar of your IDE, click on the “Run” option or press “CTRL+F11” to run your Java program:
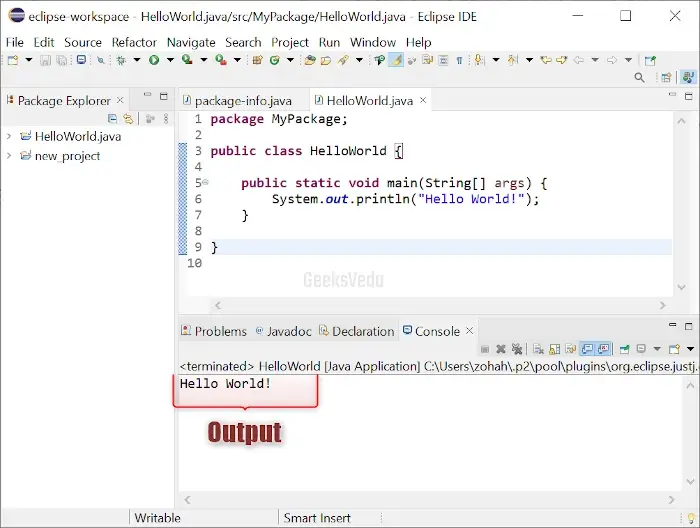
After running the program, you will see the output “Hello World!” displayed in the console or output window of your IDE. This confirms that your Java Hello World program has been successfully executed:
Congratulations! You have successfully created and run your first Java “Hello World” program. Now, it’s time to explore more exciting Java concepts and build more advanced applications!
Conclusion
Java is a robust and popular programming language that is well-known for its flexibility. You can start your Java learning journey with a simple “Hello World” program that helps you gradually progress your coding skills and makes Java programming interesting.
This journey can lead you to exciting opportunities in software development. Start it with excitement and curiosity and you will uncover the skills of Java Programming.