If you are looking for a robust tool that can assist you with scientific computing, and interactive computing, Jupyter Notebook is an ideal choice for you, as it supports multiple programming languages and can make it more suitable for a wide variety of data analysis operations.
This guide will demonstrate the approaches related to installing and using Jupyter Notebook. Moreover, we will also talk about the working of the Jupyter Notebook, understand its interface, and the relevant features.
How to Install Jupyter Notebook on Linux
For the purpose of installing Jupyter Notebook on Linux, check out the below-provided instructions.
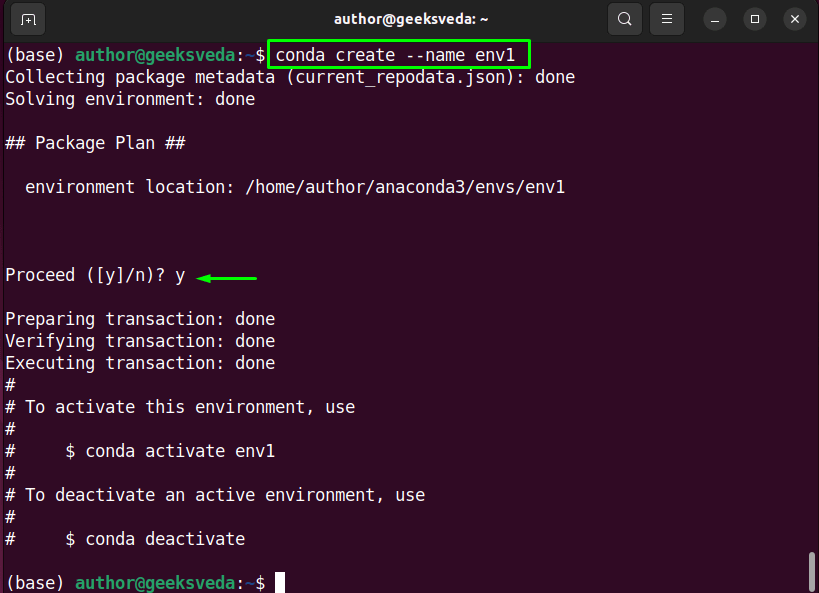
After installing Anaconda, firstly create a new conda environment in Linux.
$ conda create --name env1
In the given command, "env1" refers to the environment name, which is recommended to create a new conda environment for each project.
Then, type the following command for activating the newly created environment.
$ conda activate env1
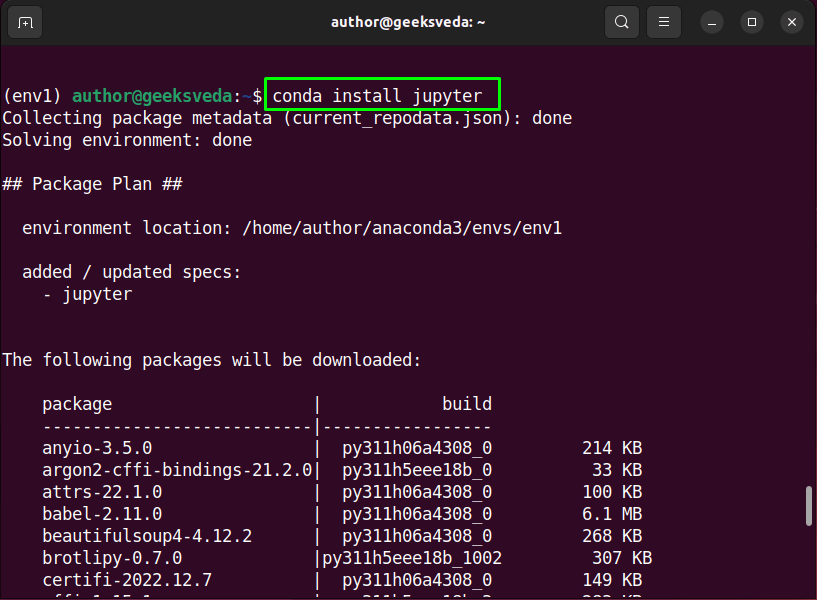
As the environment has been created and activated. Now, it’s time to install Jupyter on Linux.
$ conda install jupyter
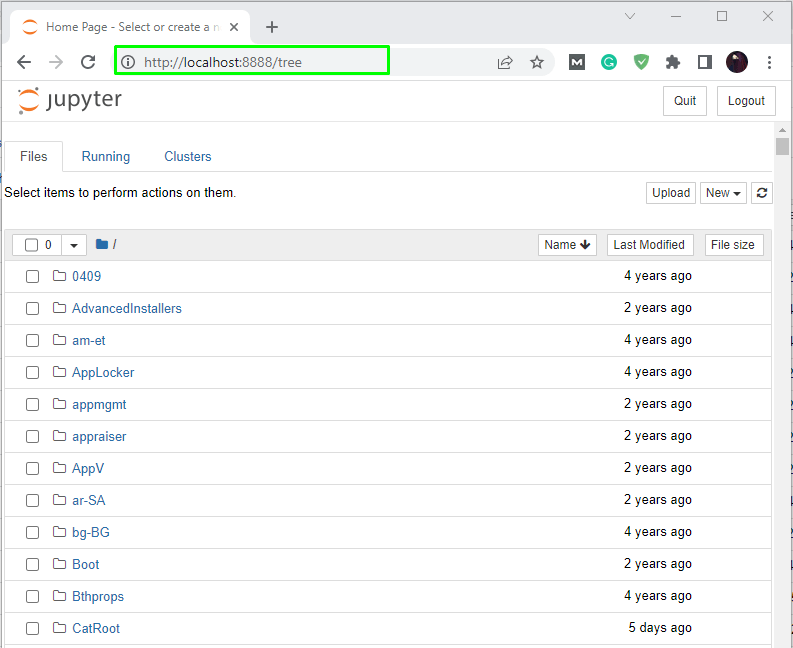
As you can see, Jupyter has been installed on our Linux system. For verification, launch the Jupyter Notebook through the terminal.
$ jupyter notebook
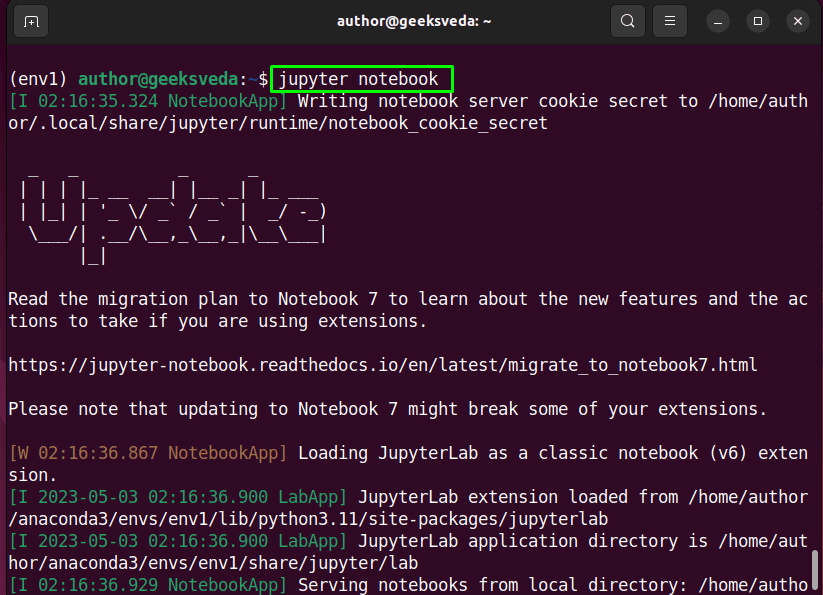
You will be provided multiple links for accessing the Jupyter Notebook. Click any of the specified links to move ahead.
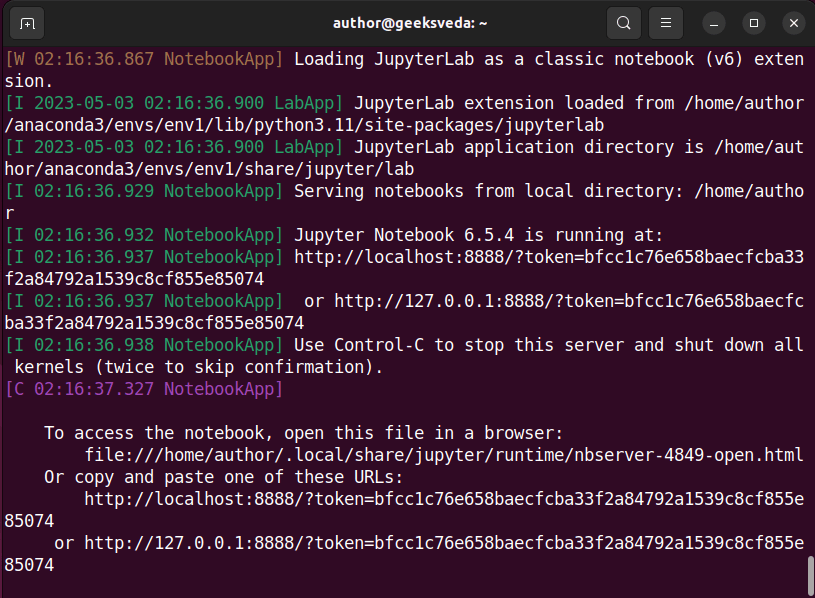
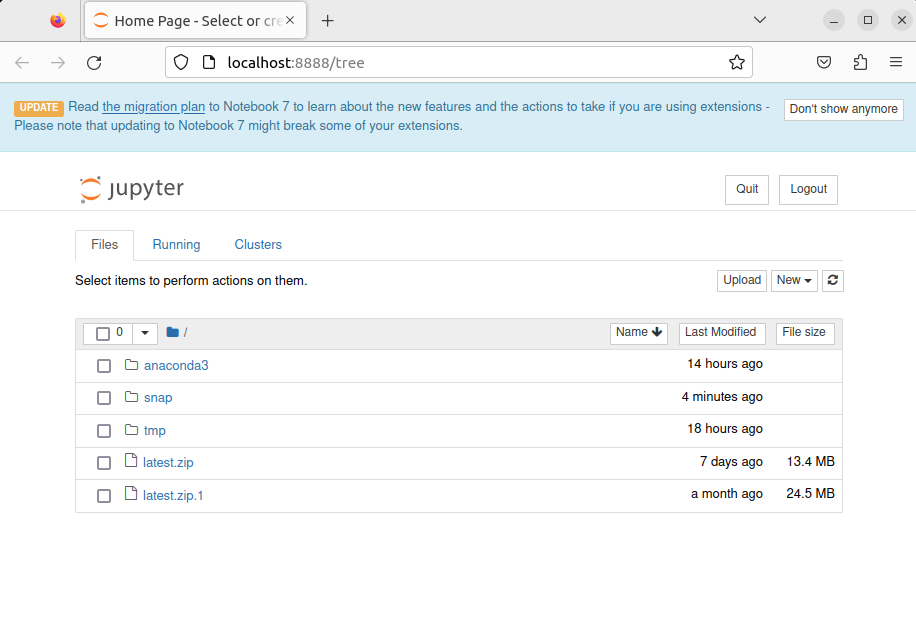
As a result, Jupyter will run in the web browser.
How to Install Jupyter Notebook on Windows
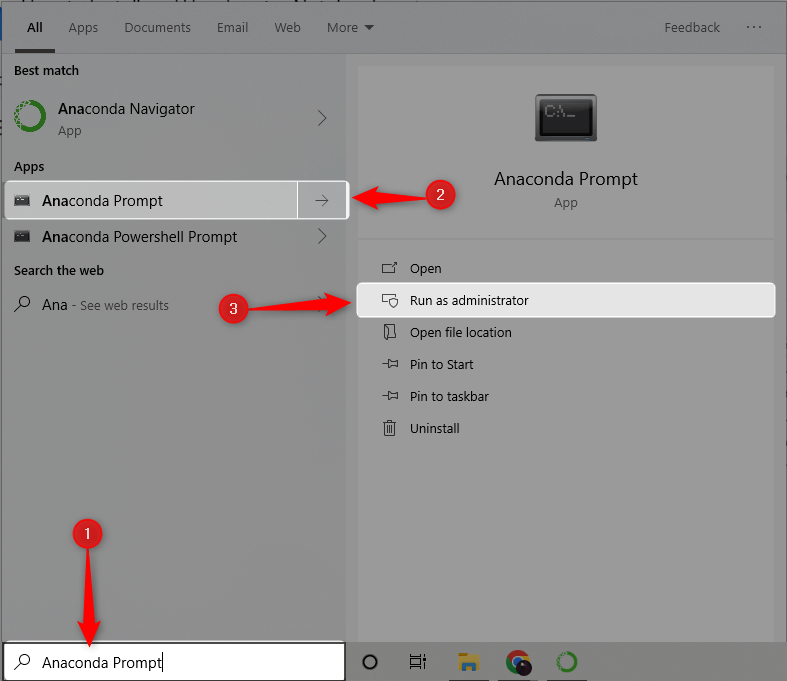
First of all, install Anaconda on your Windows system. After that, open Anaconda Prompt with administrative privileges by utilizing the Start menu.
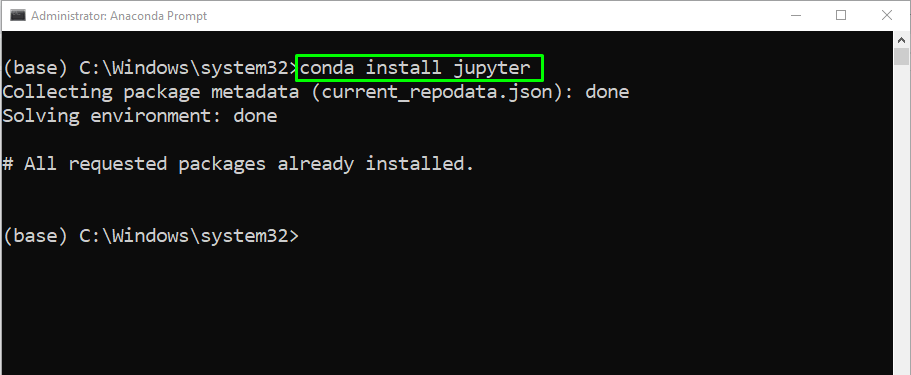
Then, install Jupyter with the help of the given command.
conda install jupyter
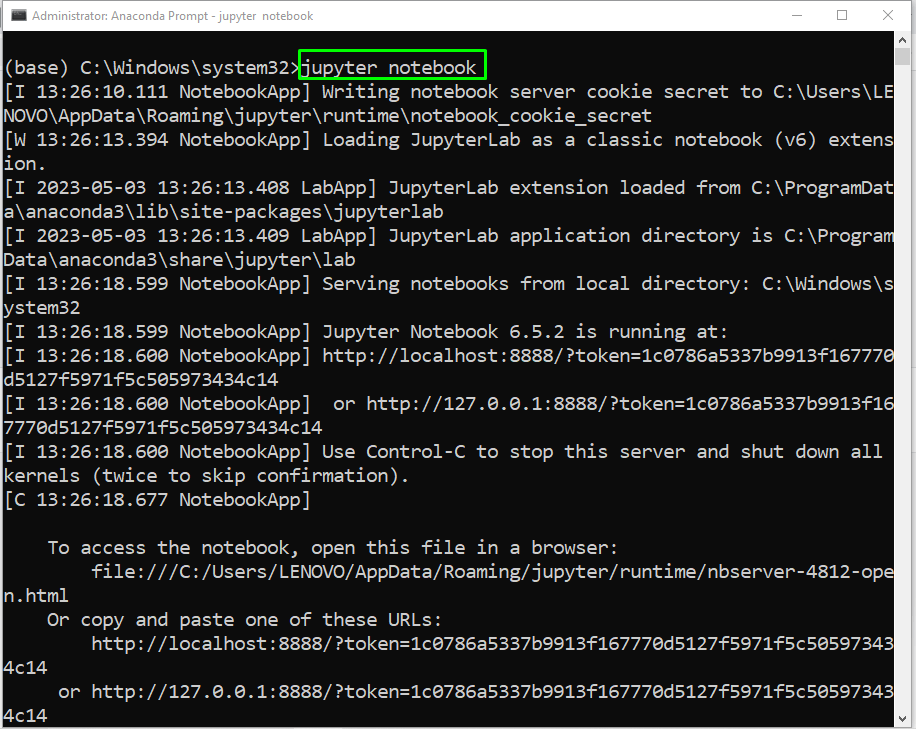
Next, launch it by typing “jupyter notebook” in the Anaconda Prompt and hit enter.
jupyter notebook
Resultantly, a new tab will open in the default web browser representing the Jupyter Notebook interface as follows.
How to Install Jupyter Notebook on Mac
Similarly, for installing Jupyter Notebook on Mac, firstly:
-
- Install Anaconda on your Mac system.
- Launch Anaconda Navigator using the Start menu.
- Look for the Jupyter Notebook icon and click on the Launch button.
- Resultantly, the Jupyter Notebook will be launched in the new table of the browser.
How to Install Jupyter Notebook with PIP
If you don’t want to install Jupyter through Anaconda, then check out this approach.
$ pip3 install --upgrade pip
$ pip3 install jupyter
$ jupyter notebook
How Does Jupyter Notebook Work
Jupyter Notebook has been built-in on top of a web-based User Interface (UI), which permits you to with the notebook by utilizing a web browser. So, when you start a Jupyter Notebook, this operation runs a web server that listens to browser requests.
The Jupyter Notebook comprises several cells, which can further contain markdown text or code. While running a code cell, the corresponding code executes on the server.
Resultantly, the output is shown in the notebook. Moreover, the notebook maintains a kernel that keeps the variable’s track, runs the code, and represents the state of the notebook.
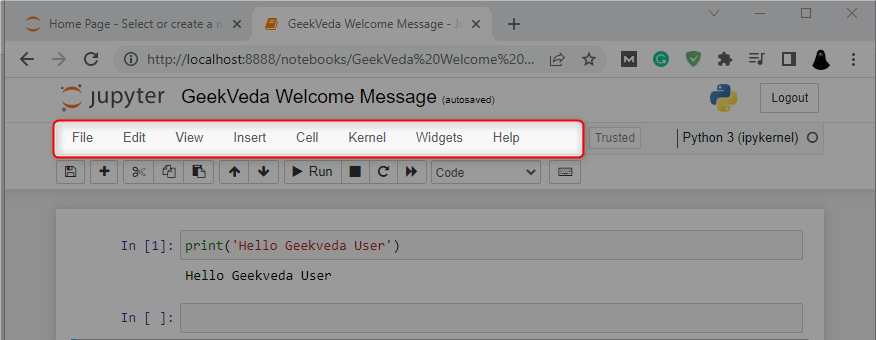
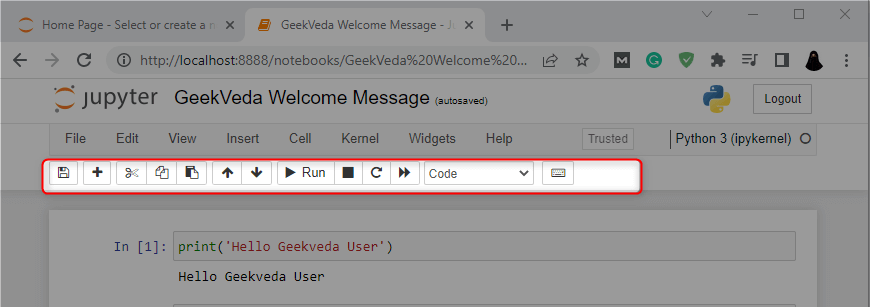
Understanding Jupyter Notebook Interface
The interface of Jupyter Notebook comprises the following major components:
Menu bar – It offers various menus for the management and editing of the Jupyter notebooks.
Toolbar – This bar includes multiple buttons for performing common operations like running cells or saving notebooks.
Notebook area – In this area, you can add and edit the Jupyter Notebook cells.
Kernel Status Indicator – It shows the current state of the kernel which can be busy, idle, or indicates an error.
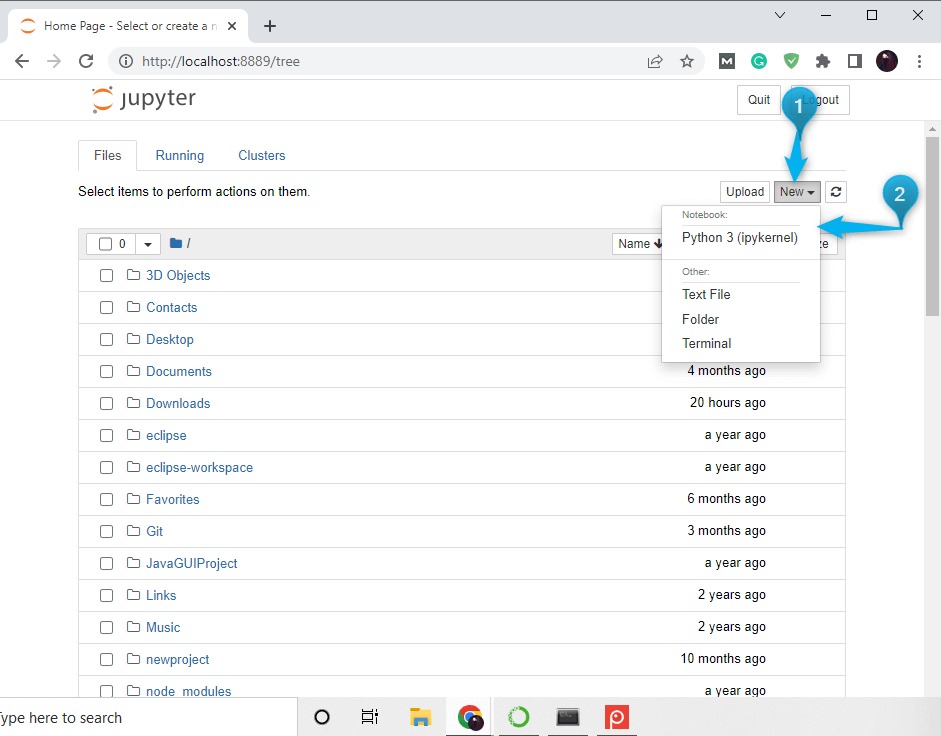
How to Use Jupyter Notebook
In order to use Jupyter for creating a new notebook, explore the “New” button present at the top right corner of the web browser, click on it, and select the “Python3 (ipykernel)” option.
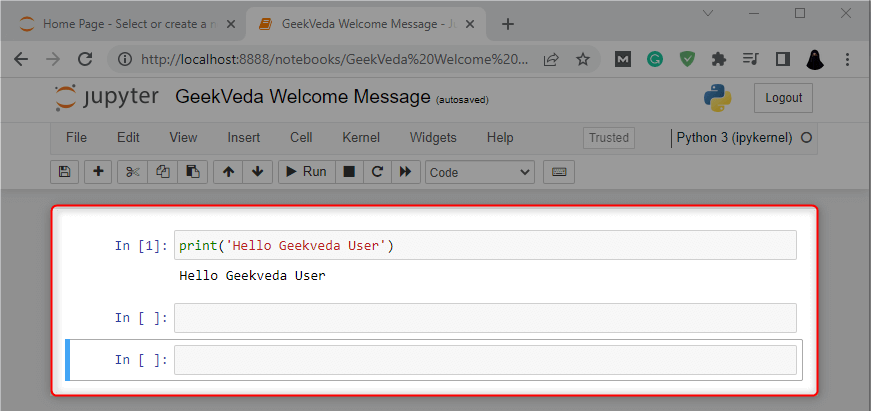
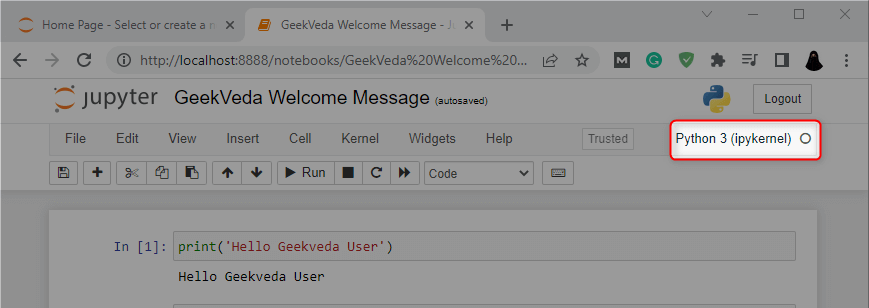
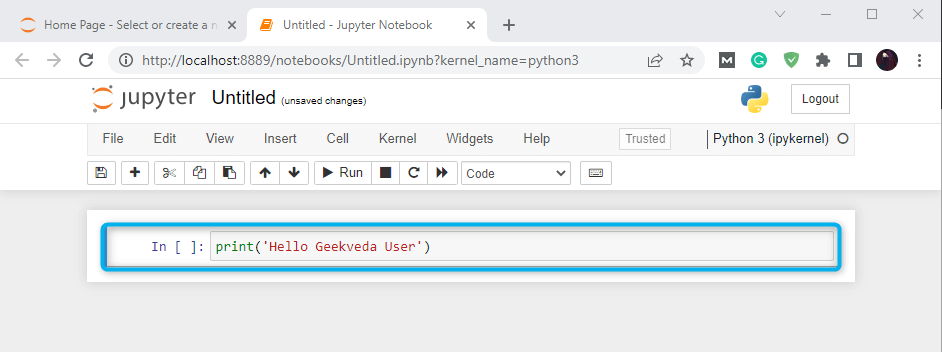
Then, add some code into the first cell of the new notebook. For instance, we have used the print() function to print out a welcome message on the console.
print('Hello Geekveda User')
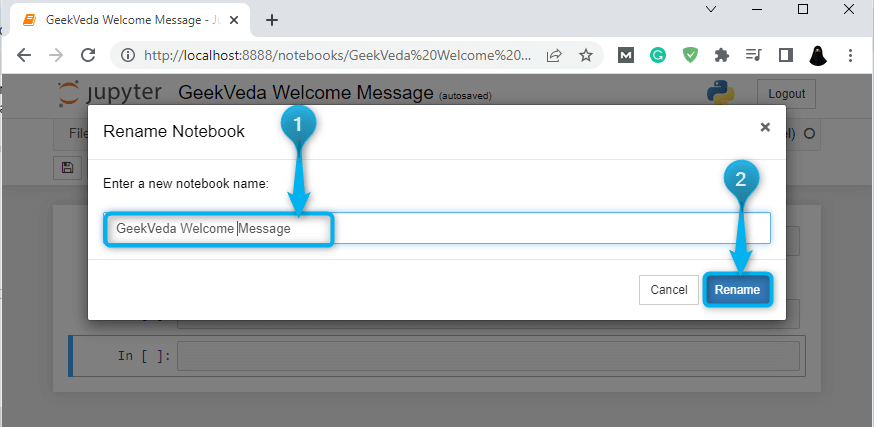
The next step is to specify a self-explanatory name for the notebook in the input field and click on the “Rename” button as follows.
Then, click on the highlighted “Run” button or press “Shift + Enter”.
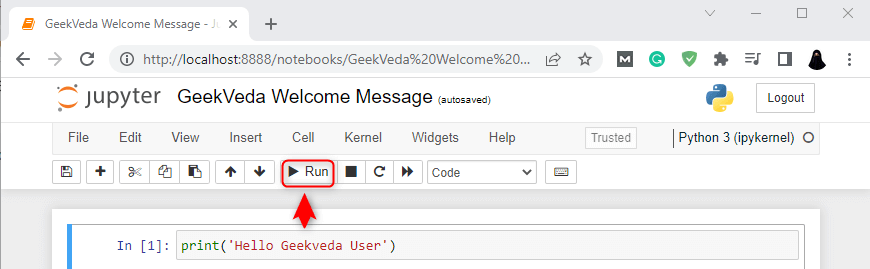
Resultantly, the output will print the added message successfully!

Why is Jupyter Notebook Useful
Here, we have provided the list of features regarding the extensive usability of the Jupyter Notebook:
- Open-Source – Jupyter Notebook is an open-source software project that signifies that it is free to use and can be customized or modified as per requirements.
- Large Community – Jupyter Notebook has an active and active community of developers. So, you can easily get started or troubleshoot problems by utilizing the tutorials and resources.
- Interactive Computing – It permits you to write and run code in an interactive way. This enables quick testing and data exploration ideas.
- Collaboration – You can easily share the notebooks and collaborate as per need. This feature makes Jupyter Notebook a fantastic tool for team workflows and group projects.
- Reproducibility – These self-contained notebooks can comprise code, relevant data, and documentation that can be used for reproducing the work.
- Data Visualization – It can be integrated with multiple data libraries, like Plotly, and Matplotlib, allowing you to make stunning visualizations within the Jupyter Notebook.
- Presentation – The notebook can be easily converted to presentation slides, which makes it easy for sharing with your network.
That was all about installation, working, basic usage, and the features related to Jupyter Notebook.
Conclusion
Jupyter Notebook is a robust tool that can be utilized for data exploration, analysis, and creating relevant visualization. By installing Jupyter Notebook and following the instructions provided in this guide, you can quickly start using this versatile tool for improving your data analysis workflow, creating stunning visualizations, and collaborating with others on your projects.